There’s something absolutely magical about that first bite of authentic Japanese Chicken Katsu – the way your teeth pierce through that impossibly crispy, golden panko crust with an audible crunch, revealing the most tender, juicy chicken beneath. This isn’t just fried chicken; it’s a masterclass in texture contrast that Japanese cuisine has perfected to an art form. The moment you hear that satisfying crunch and taste the rich, savory coating paired with succulent chicken, you’ll understand why katsu has become a global obsession.
What sets truly exceptional Japanese Chicken Katsu apart from ordinary breaded chicken is the meticulous attention to technique and the perfect harmony of flavors and textures. The secret lies in the triple-dredging process, the use of authentic panko breadcrumbs, and most importantly, maintaining the ideal oil temperature to achieve that restaurant-quality golden exterior while keeping the chicken incredibly moist. When paired with tangy katsu sauce and crisp cabbage, each bite delivers a symphony of flavors that’s both comforting and sophisticated – the kind of dish that makes you close your eyes and savor every moment.
This recipe transforms your kitchen into a Japanese restaurant, delivering that coveted crispy coating that stays crunchy even after cooling, paired with chicken so tender it practically melts in your mouth. We’re talking about the kind of katsu that rivals the best Japanese restaurants, with layers of flavor that build with each bite and a texture so satisfying you’ll find yourself craving it days later.
Why You’ll Love This Recipe
Restaurant-Quality Crunch: The triple-dredging technique combined with authentic panko creates an impossibly crispy coating that stays crunchy for hours, not just minutes.
Foolproof Juiciness: Our pound-and-brine method ensures every piece of chicken stays incredibly moist and tender, even after frying to golden perfection.
Bold, Umami-Rich Flavors: The seasoned flour blend and perfectly balanced katsu sauce deliver layers of savory depth that make each bite more satisfying than the last.
Impressive Yet Achievable: While this tastes like it came from a high-end Japanese restaurant, the technique is straightforward enough for home cooks to master.
Customizable Heat Level: From mild and family-friendly to spicy with added shichimi togarashi, this recipe adapts to your preferred flavor intensity.
Key Ingredients
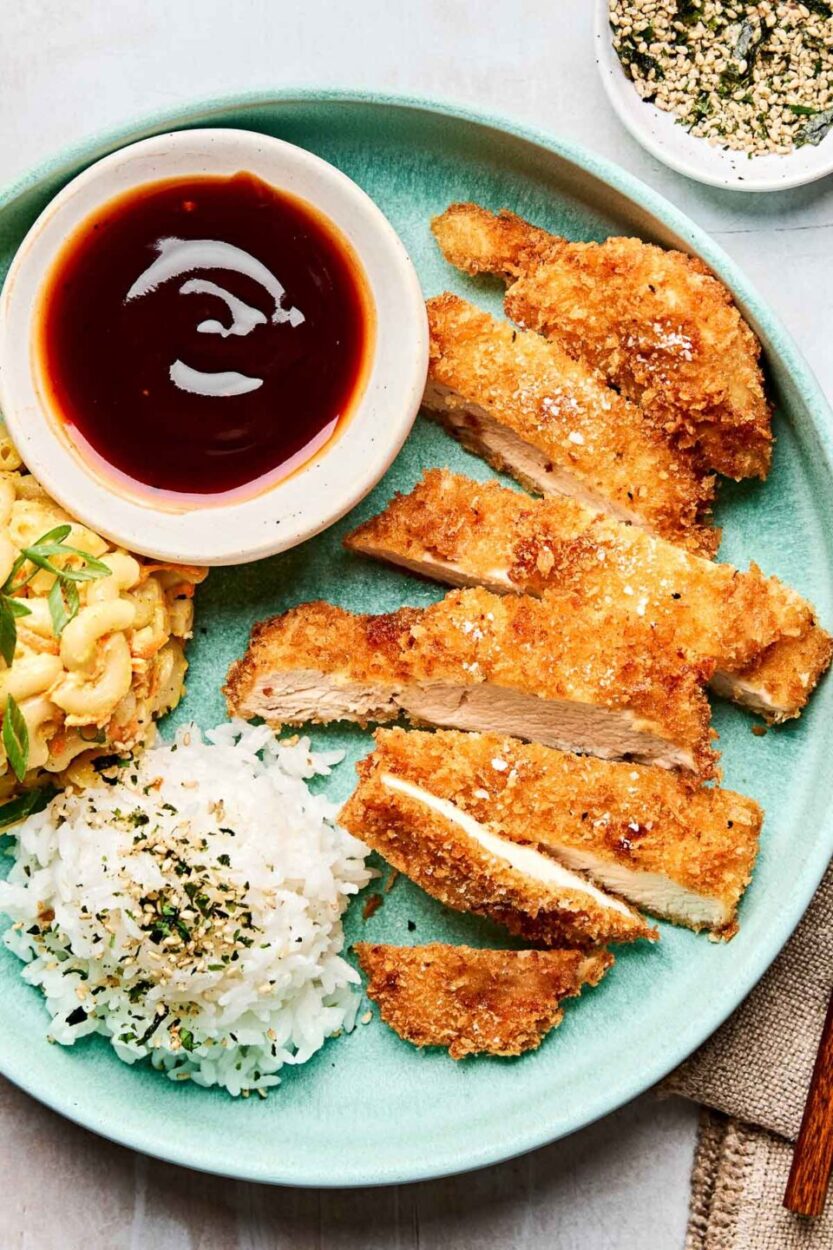
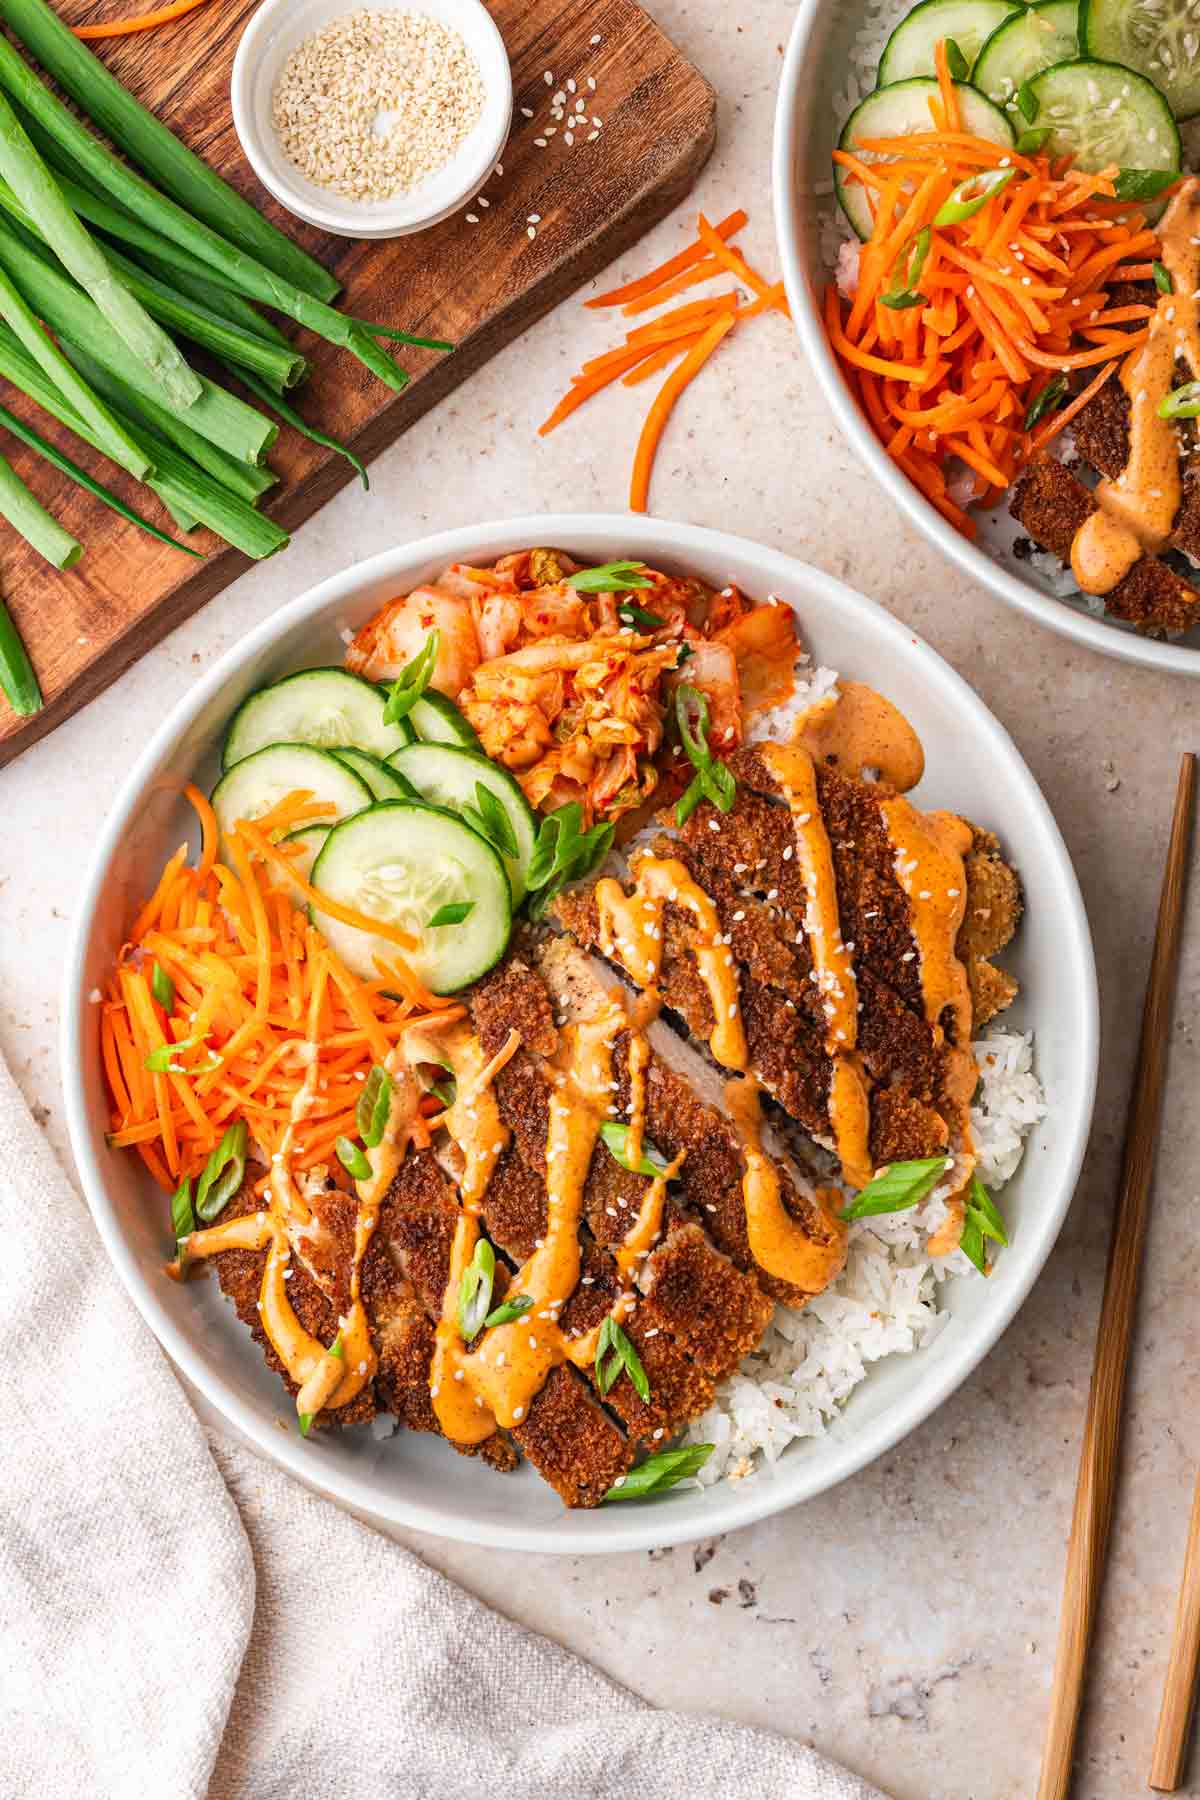
The magic of exceptional Japanese Chicken Katsu starts with selecting the right ingredients, each playing a crucial role in creating that perfect balance of flavors and textures. Boneless chicken thighs are the star here – their higher fat content ensures the meat stays incredibly juicy even after frying, while their uniform thickness cooks evenly. Authentic panko breadcrumbs are absolutely non-negotiable; these airy, flaky Japanese breadcrumbs create that signature light-yet-crispy coating that regular breadcrumbs simply can’t match. The all-purpose flour seasoned with garlic powder and white pepper forms the foundation layer that helps the egg wash adhere while adding subtle savory notes. Fresh eggs beaten with a splash of milk create the perfect binding agent that ensures your panko coating stays put during frying. High-heat neutral oil like vegetable or canola maintains the ideal frying temperature without imparting unwanted flavors, while the homemade katsu sauce – a perfect blend of Worcestershire, ketchup, and soy sauce – provides that sweet-tangy finish that makes each bite irresistible.
Pro Tips & Variations
Temperature is Everything: Maintain your oil temperature between 340-350°F for the perfect balance of crispy exterior and juicy interior. Too hot and the coating burns before the chicken cooks through; too cool and you’ll end up with greasy, soggy katsu.
Double-Dredge for Maximum Crunch: After your initial flour-egg-panko sequence, dip the cutlet back in egg wash and panko one more time. This creates an extra-thick, restaurant-quality coating that stays crispy longer.
Rest for Success: Let your breaded cutlets rest for 15 minutes before frying. This allows the coating to set and prevents it from falling off during cooking.
Pork Katsu Variation: Substitute pork loin cutlets for an equally delicious tonkatsu – just ensure they’re pounded to an even ¼-inch thickness for consistent cooking.
Lighter Oven Version: For a healthier take, spray breaded cutlets with oil and bake at 425°F for 20-25 minutes, flipping once halfway through.
Spicy Katsu Upgrade: Mix shichimi togarashi (Japanese seven spice) into your panko for a gentle heat that complements the rich flavors beautifully.
Just like our Japanese Beef Curry, this katsu delivers that same level of comfort food satisfaction with bold, authentic flavors that transport you straight to Tokyo.
Nutritional Highlights
While Japanese Chicken Katsu is undeniably an indulgent dish, it offers substantial nutritional benefits that make it a satisfying and balanced meal. Each serving provides approximately 520 calories with an impressive 42 grams of high-quality protein from the chicken thighs, supporting muscle maintenance and keeping you satisfied for hours. The moderate fat content (around 28 grams) comes primarily from healthy cooking oil and the natural fats in chicken, which help with nutrient absorption and satiety. When served with the traditional shredded cabbage and steamed rice, you’re adding essential vitamins, minerals, and fiber to create a more complete nutritional profile. The traditional Japanese preparation method also preserves more of the chicken’s natural nutrients compared to heavily processed alternatives, making this a more wholesome choice for satisfying your fried food cravings.
FAQ
Can I make Japanese Chicken Katsu ahead of time?
Yes! You can bread the cutlets up to 4 hours in advance and refrigerate them on a wire rack. For make-ahead meals, fry the katsu completely, then store in the refrigerator for up to 3 days. To reheat and restore crispiness, place on a wire rack over a baking sheet and heat in a 375°F oven for 8-10 minutes, flipping once. Avoid microwaving as it will make the coating soggy.
What can I substitute for panko breadcrumbs?
While panko is essential for authentic texture, you can make a substitute by processing day-old white bread (crusts removed) in a food processor until you get light, airy crumbs. Regular fine breadcrumbs work in a pinch but won’t provide the same dramatic crunch. Crushed cornflakes mixed with regular breadcrumbs can also create interesting texture variation, though it won’t be traditional.
How do I store leftover katsu and what’s the best way to reheat it?
Store leftover katsu in an airtight container in the refrigerator for up to 3 days. For best results, place parchment paper between layers to prevent sticking. To reheat, never use the microwave as it makes the coating soggy. Instead, preheat your oven to 375°F, place katsu on a wire rack over a baking sheet, and heat for 8-12 minutes until crispy and heated through. You can also reheat in an air fryer at 350°F for 3-4 minutes per side.

This Japanese Chicken Katsu recipe brings restaurant-quality indulgence straight to your home kitchen, delivering that perfect combination of crispy coating and tender, juicy chicken that makes every bite absolutely irresistible. The rich, savory flavors and satisfying textures create the kind of memorable dining experience that has you planning your next katsu meal before you’ve even finished the first. Whether you’re exploring Japanese cuisine or perfecting your comfort food repertoire, this recipe delivers the bold, crave-worthy flavors that make authentic katsu such a beloved dish worldwide.
Similar to our Miso Glazed Salmon, this katsu showcases how Japanese cuisine masterfully balances bold umami flavors with perfect cooking techniques to create truly unforgettable dishes.
Save this recipe to your favorites and share it with fellow food lovers who appreciate the finer things in life – because exceptional katsu like this is too good to keep to yourself. Your friends and family will be begging for the secret to your restaurant-quality results!
Find the complete recipe card below ↓

Japanese Chicken Katsu
Equipment
- Large heavy-bottomed pot
- Meat mallet
- Wire cooling racks
- Instant-read thermometer
- Shallow dishes for breading
Ingredients
- 2 lbs boneless skinless chicken thighs pounded to 1/2-inch thickness
- 1 cup all-purpose flour
- 1 tsp garlic powder
- 1 tsp white pepper
- 1 tsp salt
- 3 large eggs
- 2 tbsp whole milk
- 3 cups panko breadcrumbs
- 4 cups vegetable oil for frying
- 1/3 cup ketchup
- 3 tbsp Worcestershire sauce
- 2 tbsp soy sauce
- 1 tbsp mirin
- 1 tsp sugar
- 4 cups shredded cabbage for serving
Instructions
- Place chicken thighs between plastic wrap and pound to an even 1/2-inch thickness. Season both sides generously with salt and let rest for 15 minutes.
- Set up three shallow dishes: combine flour, garlic powder, white pepper, and 1 tsp salt in the first; whisk eggs and milk in the second; place panko in the third.
- Make katsu sauce by whisking together ketchup, Worcestershire sauce, soy sauce, mirin, and sugar in a small bowl. Set aside.
- Heat oil in a large, heavy-bottomed pot or deep skillet to 340-350°F. Use a thermometer to monitor temperature.
- Dredge each chicken piece in flour mixture, shaking off excess, then dip in egg wash, and finally coat thoroughly in panko, pressing gently to adhere.
- For extra crunch, dip coated cutlets back in egg wash and panko one more time. Let rest on a wire rack for 15 minutes.
- Carefully place 2 cutlets in hot oil and fry for 3-4 minutes per side until deep golden brown and internal temperature reaches 165°F.
- Transfer to a wire rack over paper towels to drain. Repeat with remaining cutlets, monitoring oil temperature between batches.
- Slice katsu into strips and serve immediately over shredded cabbage with katsu sauce and steamed rice.