

The Cookie Tin That Makes Everyone Stop and Stare
There is something about a plate of Christmas sugar cookies that stops a room cold. Not just the colors — the deep reds, the forest greens, the shimmering gold — but the smell. That warm, buttery, vanilla-laced aroma that drifts out of the oven and fills every corner of the house like the best kind of holiday soundtrack. These cookies are not an afterthought on a dessert table. They are the centerpiece. They are the thing guests reach for first, the thing kids beg to decorate, and the thing adults quietly eat three of while pretending to arrange the platter.
What sets this recipe apart from every disappointing sugar cookie you have ever had is the texture and the structure. These cookies are rich and buttery with a tender, slightly firm crumb that bites clean without crumbling — giving you that satisfying snap that tells you the dough was made right. They hold their shape flawlessly in the oven, so your stars look like stars, your reindeer have all four legs, and your snowflakes come out looking like actual snowflakes. The royal icing that goes on top dries to a glossy, smooth finish that is as beautiful as it is delicious — just sweet enough, with a clean vanilla flavor that never tastes like sugar paste.
Whether you are baking for a cookie exchange, filling a gift tin for neighbors, decorating with your kids on a snow day, or just indulging in one of the most satisfying holiday rituals there is, this recipe delivers every single time. It is the kind of recipe you laminate and pass down. Find the complete recipe card below ↓

Why You’ll Love This Recipe
- Perfect shape every time. The dough is formulated to hold crisp edges — no spreading, no puffy blobs. Your cookie cutters actually matter here.
- Buttery, rich flavor. This is not a bland base. Real butter, real vanilla, a touch of almond extract — every bite tastes indulgent and intentional.
- Royal icing that actually works. Smooth, pipeable, and sets to a gorgeous glossy finish without cracking or staying sticky.
- Make-ahead friendly. The dough chills overnight, the baked cookies freeze beautifully, and the icing stores for days. Built for holiday chaos.
- Endlessly customizable. Every color, every shape, every sprinkle is yours to choose. This recipe is a blank canvas for your most creative holiday vision.
- Crowd-pleasing and gift-worthy. These are the cookies people ask for the recipe for. They look bakery-level, they taste restaurant-quality, and they travel beautifully in a tin.
Key Ingredients and Why They Matter
Great Christmas sugar cookies start with real unsalted butter, and lots of it. Butter is the backbone of flavor here — it creates that rich, melt-in-your-mouth quality that shortening simply cannot replicate. It needs to be properly softened (not melted, not cold) so it creams into the sugar and builds structure. Speaking of which, granulated sugar is the right choice over powdered sugar for this dough — it gives the cookies a slightly crisp exterior while keeping the interior tender. All-purpose flour is non-negotiable: the protein structure it provides is exactly what helps these cookies hold their sharp cut-out edges without puffing up or spreading in the heat. For flavor, a generous pour of pure vanilla extract does the heavy lifting, but the real secret weapon is a small splash of almond extract — it adds that signature bakery-style depth that makes people say “what is that flavor?” and reach for another cookie immediately. Finally, the meringue powder in the royal icing is what allows it to dry hard, smooth, and shiny without eggs, making it safer for everyone and far easier to work with across a full decorating session.
Pro Tips & Variations
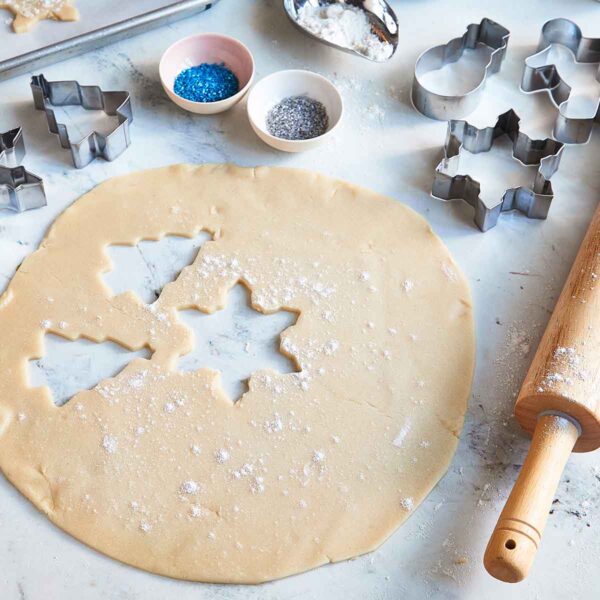
- Chill the dough — seriously. At least 2 hours, preferably overnight. Cold dough is the number one factor in whether your cookies hold their shape. Do not skip this step. If you are working in a warm kitchen, chill the cut-out cookies on the baking sheet for 10 minutes before they go in the oven too.
- Roll to exactly ¼ inch. Too thin and they overbake and become crisp; too thick and they stay doughy in the center. Use rolling pin guides or rubber bands to get it precise every time.
- Do not overbake. Pull them out when the edges are just barely beginning to turn golden. They will look underdone — that is exactly right. They firm up as they cool and stay perfectly tender inside.
- Two consistencies of royal icing. Make a thicker icing for outlining and a thinner, flood-consistency icing for filling. Thin it with water, one teaspoon at a time, until a drizzled line disappears in about 10 seconds.
- Flavor the icing too. A drop of vanilla or almond extract in the royal icing makes a huge difference. Plain royal icing can taste flat — seasoned icing tastes like a real cookie topping.
- Lemon zest variation. Add the zest of one lemon to the dough for a bright, citrusy twist that pairs beautifully with the sweet icing. It is one of the most popular variations and makes the cookies feel a little more sophisticated.
- Sprinkles go on wet icing. Add sprinkles immediately after flooding a section with icing, before it starts to set. If you wait even a few minutes, they will not adhere properly.
- Freeze for later. Baked, undecorated cookies freeze perfectly for up to 3 months. Stack them between layers of parchment and store in a zip-lock bag. Decorate after thawing — it is a great way to spread out the holiday baking workload.
If you love baking for the holidays, this recipe lives happily alongside other festive bakes on the site. Our Apple Cider Donuts — Baked, Spiced & Coated in Cinnamon Sugar make a phenomenal addition to any holiday brunch spread, and our No Bake Pumpkin Cheesecake — Silky, Spiced & Impossibly Creamy is the kind of showstopper dessert that earns its place right next to a plate of these cookies on any holiday table. And if you are building out a full holiday dinner menu, our Honey Glazed Ham — Sticky Brown Sugar Glaze on a Spiral Ham is the main course these cookies were born to follow.
For deeper insight into the science of sugar cookie structure and what makes royal icing set up glossy, the team at Serious Eats has done extensive testing that is well worth reading. And for creative decorating inspiration and color technique guides, Food Network’s royal icing resource is a great reference to have open while you decorate.
Nutritional Highlights
Each Christmas sugar cookie with royal icing comes in at approximately 180 calories, with the butter and flour providing the base energy and the icing contributing the majority of the sugar load. While these are absolutely an indulgent holiday treat — and they should be — they are made with straightforward, recognizable pantry ingredients: real butter, eggs, flour, and sugar. No preservatives, no artificial flavors beyond what you choose to add. If you want to lighten things slightly, you can reduce the icing coverage or use a thinner flood layer. The almond extract means a little flavor goes a long way, so you do not need a mountain of icing to make each cookie taste extraordinary. These are a once-a-year indulgence worth every single calorie.
Frequently Asked Questions
Can I make the dough ahead of time?
Absolutely — and in fact, it is strongly encouraged. The dough can be made up to 3 days in advance and stored tightly wrapped in the refrigerator. You can also freeze the dough for up to 2 months. Wrap it in plastic wrap and then in a zip-lock freezer bag. Thaw overnight in the refrigerator before rolling and cutting. Making the dough ahead is one of the best ways to manage holiday baking without stress.
Why did my sugar cookies spread and lose their shape?
Spreading is almost always caused by one of three things: butter that was too soft or melted, dough that was not chilled long enough, or too little flour. Make sure your butter is softened but still cool to the touch — you should be able to press a finger in but it should not be greasy or shiny. Always chill your dough for at least 2 hours. And measure your flour correctly by spooning it into the measuring cup and leveling it off rather than scooping directly from the bag, which packs in too much air and can skew measurements.
How long does royal icing take to dry, and how do I store decorated cookies?
Royal icing made with meringue powder typically takes 6 to 8 hours to dry completely at room temperature, though the surface will feel set after about 2 hours. For stacking and packaging, always wait for the full dry time. Store decorated cookies at room temperature in an airtight container, layered between sheets of parchment paper, for up to one week. Do not refrigerate decorated cookies — condensation can cause the icing to soften and colors to bleed. Undecorated baked cookies can be frozen for up to 3 months.

Make This Holiday Season Unforgettable
Christmas sugar cookies are one of those recipes that exist at the intersection of tradition, creativity, and pure sensory joy. The smell of them baking, the meditative focus of decorating each one, the pride of setting out a finished platter — it is a whole experience, not just a cookie. This recipe gives you the bulletproof foundation: a dough that behaves, a cookie that tastes as good as it looks, and a royal icing that makes every piece feel intentional and beautiful. Whether you go all-out with multi-color flooding and fine-detail piping, or keep it simple with a single-color glaze and a pile of sprinkles, the results are going to be stunning.
If you make these, we want to see them. Share your decorated cookies in the comments below, tag us on social media, and save this recipe for next year — because once you have a go-to Christmas sugar cookie recipe that actually works, you hold onto it forever.
Find the complete recipe card below ↓

Christmas Sugar Cookies
Equipment
- Stand mixer or hand mixer
- Rolling pin
- Cookie cutters (holiday shapes)
- Baking sheets
- Parchment paper
- Wire cooling rack
- Piping bags
- Piping tips (round #2 and #3)
- Mixing bowls
Ingredients
Cookie Dough
- 3 cups all-purpose flour spooned and leveled
- 1 tsp baking powder
- 1/2 tsp salt
- 1 cup unsalted butter 2 sticks, softened to room temperature
- 1 cup granulated sugar
- 1 large egg room temperature
- 1 tsp pure vanilla extract
- 1/2 tsp almond extract
Royal Icing
- 3 cups powdered sugar sifted
- 3 tbsp meringue powder
- 5-6 tbsp warm water plus more to thin for flooding
- 1/2 tsp vanilla extract or almond extract
- gel food coloring red, green, and any holiday colors desired
- holiday sprinkles optional, for decorating
Instructions
Make the Cookie Dough
- In a medium bowl, whisk together the flour, baking powder, and salt. Set aside.
- In the bowl of a stand mixer fitted with the paddle attachment (or using a hand mixer), beat the softened butter and granulated sugar together on medium-high speed for 3-4 minutes until light, pale, and fluffy. Scrape down the sides of the bowl.
- Add the egg, vanilla extract, and almond extract. Beat on medium speed for another 1-2 minutes until fully combined and smooth.
- Reduce mixer speed to low and gradually add the flour mixture in three additions, mixing just until a soft dough forms and no dry streaks remain. Do not overmix.
Chill the Dough
- Divide the dough in half. Flatten each half into a disk about 1 inch thick, wrap tightly in plastic wrap, and refrigerate for at least 2 hours or overnight. This step is essential for crisp cut-out edges.
- When ready to bake, preheat your oven to 375°F (190°C). Line two baking sheets with parchment paper.
Roll and Cut
- Remove one disk of dough from the refrigerator. On a lightly floured surface, roll it out to an even ¼-inch thickness. Use rolling pin guides or rubber bands for consistency.
- Cut out shapes with your holiday cookie cutters, pressing firmly and cleanly. Place cut-out cookies on the prepared baking sheets, spacing them about 1 inch apart.
- Re-roll scraps once and cut again. For the crispest edges, place the entire baking sheet in the refrigerator for 10 minutes before baking.
Bake the Cookies
- Bake for 10-12 minutes, until the edges are just barely beginning to turn light golden. The centers will look slightly underdone — this is correct.
- Remove from oven and let cookies cool on the baking sheet for 5 minutes before transferring to a wire rack. Cool completely before decorating — at least 1 hour.
Make the Royal Icing
- In a large bowl, beat together the sifted powdered sugar, meringue powder, warm water, and vanilla extract with a hand mixer on medium-high speed for 5-7 minutes, until the icing is thick, glossy, and holds stiff peaks.
- Divide the icing into bowls. Tint with gel food coloring as desired, mixing thoroughly.
- For outlining: use the icing at this thick consistency, transferred to a piping bag fitted with a round #2 tip.
- For flooding (filling): thin portions of icing with warm water, one teaspoon at a time, until a drizzled line disappears in about 10 seconds. Transfer to a piping bag or squeeze bottle.
Decorate
- Outline each cookie with thick icing and let the outline set for 2-3 minutes. Then flood the inside with the thinner icing, using a toothpick to spread it into corners and pop any air bubbles.
- Add sprinkles or other decorations immediately while the icing is still wet. For detailed designs on top, let the flood layer dry for at least 2 hours before adding fine piped details.
- Let all decorated cookies dry at room temperature, uncovered, for at least 6-8 hours or overnight until the icing is completely set and hard before stacking or packaging.